
Skylum recently released Luminar 4.3, the first update to the Mac and Windows photo-editing software that goes beyond what’s covered in my book The Photographer’s Guide to Luminar 4. When you write books about software, you know this point is coming, and you hope for the best. I was able to roll the Luminar 4.2 changes into the book literally days before it went to press, so it felt good that the book has been 100% accurate for most of this year. Fortunately, the changes in version 4.3 aren’t huge, but they do change a few things compared to what’s in the book. Hence, this post.
Before I dig into the differences, two things to note:
 If you don’t yet own the book, you can buy it in print or ebook formats at the usual outlets, such as Amazon.com and the Apple Bookstore (ebook only). You can also buy the book directly from my awesome publisher, Rocky Nook, which offers print and ebook bundles. Use the code
 CARLSON40to get 40% off your order!- Shortly after readers started receiving their copies, several folks asked for downloads of the images used in the walkthroughs in chapters 2 and 3. We were able to edit the ebook version to include the download link (you may have to re-download the ebook if you don’t see it), but not the print version. So, if you own the print book and want to work with the images used in the walkthroughs, send me a message and I’ll point you to the files.
Luminar 4.3 includes requisite “stability and performance improvements,” as one would expect from a dot-update like this. In my experience, the program does feel more snappy on my MacBook Pro, so that’s always a welcome improvement. I’ve seen reports online of Windows users not seeing the same, or encountering problems, so as with all software updates, keep in mind that your mileage may vary.
The responsiveness of Luminar Looks is improved, but even better, when you hover your mouse over one of the Looks thumbnails, you’ll see a preview of the effect on the image itself.
Also, if you have a 500px account, there’s now a 500px option under the Share menu.
Now, let’s get to the other changes.
Updated Crop & Rotate Tool
Although the Crop & Rotate tool has the same features as before, Skylum slightly changed how it’s activated. You still go to the Canvas tools and click Crop & Rotate, but in Luminar 4.3 the tool acts like most of the tools in the program, with controls in the Edit sidebar; previously, the tool took over the entire interface, hiding the sidebar.

For Windows users, this update finally brings the Crop & Rotate tool into parity with the macOS version. In the sidebar, you’ll find buttons for Flip Horizontal, Flip Vertical, and Rotate Left that affect the entire canvas.
A new button to the right of the tool name, Rotate Crop, allows you to switch the crop area between landscape and portrait orientation. (Clicking it produces the same effect as choosing Transposed from the Aspect Ratio menu.)
Gone are the Rule of Thirds and Phi Grid buttons to control which grid overlay appears; now the tool just displays a Rule of Thirds grid. Also gone is the Lock button that maintains the current aspect ratio. Choosing Free from the Aspect Ratio menu “unlocks” that constraint.
Search Tool
Luminar finally has the ability to search your Luminar Library, but don’t get excited. There’s still no support for editing EXIF metadata, keywords, or anything useful like that. Instead, the new Search bar in the Library tab (which shows up when you view the library in Gallery view) looks at file names and extensions. So if you rename your images on disk before pointing Luminar at them, this feature could be helpful.
I’m overreacting a little, mostly because I’m a firm believer in being able to Take Control of Your Digital Photos and find anything you want quickly. So there’s good news here, too: the Search field can also find by date. Typing July into the field quickly tells you how many photos in your library were shot during that month and lets you view just those images.

Skylum promised a full digital asset manager (DAM) two years ago, and have walked that back over time as they refocused their efforts on AI tools. I get it. But I’m also hoping for more text support than this, something that has been on their roadmap for a while.
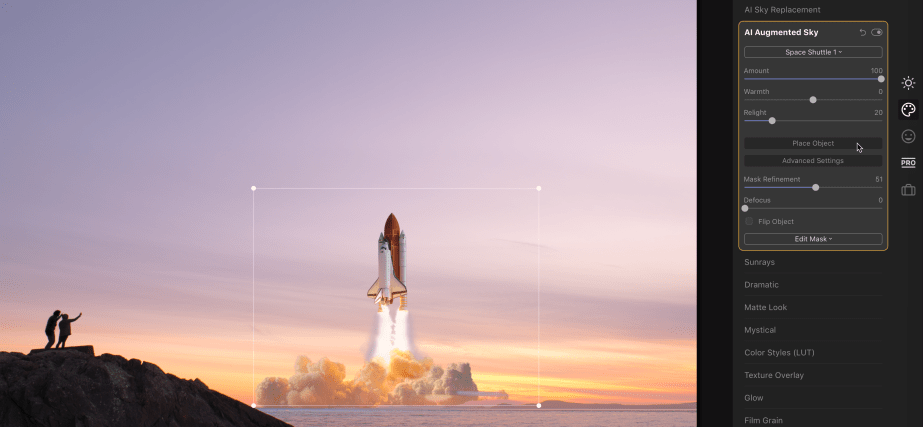
AI Augmented Sky
Skylum’s foray into expanding Luminar into an artistic composition tool has been updated in a small way. A new space shuttle object is now available for placing into the sky. You can also flip the object horizontally by clicking the Flip Object checkbox. As with Luminar 4.2, click the Place Object button to move, resize, or rotate the object.
AI Sky Replacement
The AI Sky Replacement tool is really one of those “oh wow” moments when you first start using Luminar. In my experience, it does a great job of automatically identifying a sky and replacing the area with another image. (See this portion of one of the webinars I did for Rocky Nook to see the feature in action, which starts at 39:17.)
Luminar includes a bunch of skies, but of course it’s better to use your own to make sure your photo is unique. In earlier versions, you could load only one sky image at a time. In Luminar 4.3, you’ll find a new Show Custom Skies option in the Sky Selection menu, which opens a folder in the Finder or Windows Explorer. Copy your sky images to that folder, and they’ll show up at the top of the Sky Selection menu.

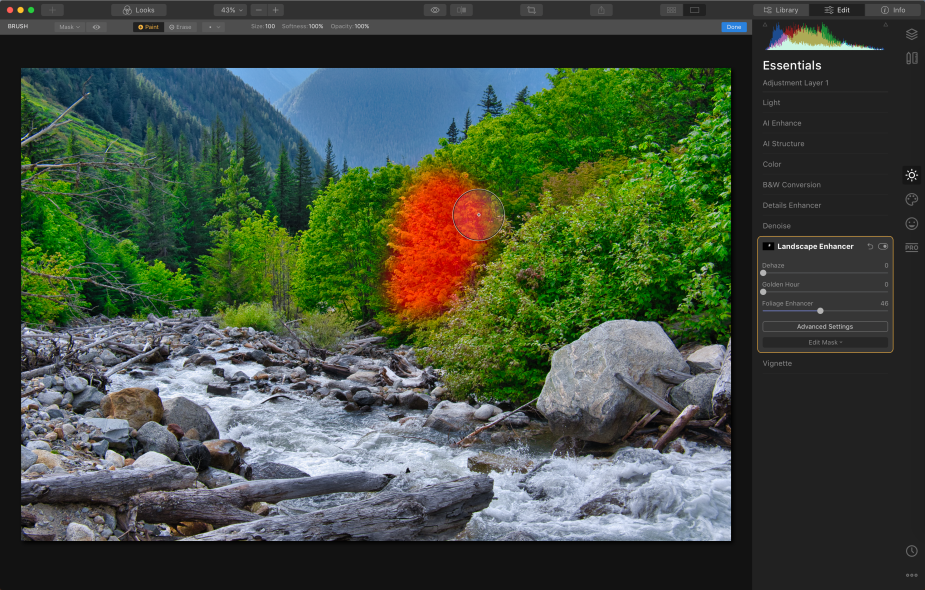
New Masking Brush Workflow
When working with a mask using the Brush Mask tool, the red mask overlay is now visible as you paint, even when Show Mask is turned off. This helps you see where you’re applying the mask as you do it. When you’re done painting, the red overlay hides so you can see the result.
Profile Selector Moved
This one falls into the category of “it’s a small move, but it messes up all my screenshots.” When you’re editing a raw image, you’ll now see the Profile pop-up menu in the Light tool under White Balance. Previously, it was under the Light tool’s Advanced Settings block. The tool works the same (see page 77 in the book).

